
Readers have been interested in finding out how to install WordPress on Amazon Web Services. Given that Amazon Web Services is one of the most powerful cloud computing platforms that allows people to harness the power of Amazon infrastructure, at an affordable cost. The article intends to cover the nuances of the steps on how to install WordPress on Amazon Web services.
Lets get started
Step 1: visit the Amazon Web Services website and set up a free account
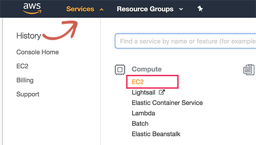
One of the first things that you need to do is visit the Amazon Web Services website. You can enter your credit card information and create a free account. Amazon tends to deduct a dollar from the account to verify the same. Once the account is verified, you can login to your AWS console, navigate to the services menu, and move to the compute section where you can select the EC2 to continue.
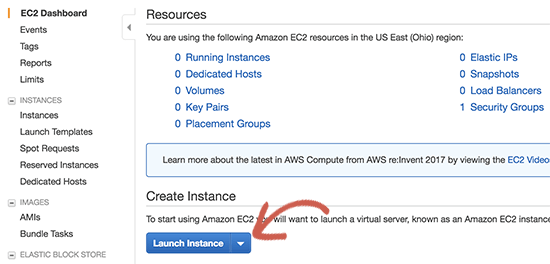
Step 2: launch an instance
EC2 is the cloud services platform’s mechanism which allows you to create virtual machines which can run applications such as WordPress. You can find more information on the virtual machines from the website. You can launch instance by clicking on the button and configure the instance settings.
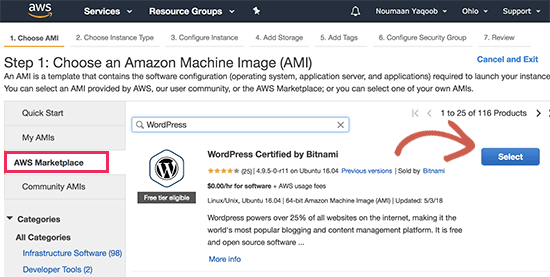
You can select amazon machine image. These are complete software stack which can be installed easily with a single click button.AWS Marketplace is bound to spoil you for choices. Under the marketplace you could search for the WordPress and then select WordPress by Bitnami.
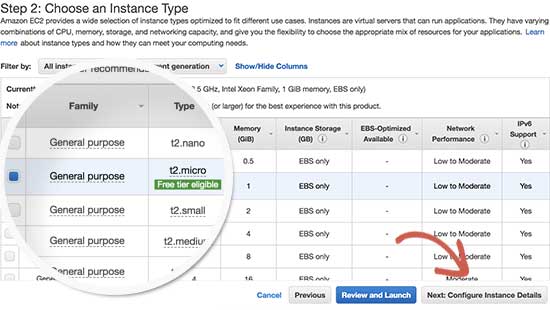
You can see a pricing pop-up where you need to click on a few options which leads you to the continue button. Select the instance type on the screen, and then you can select td. micro and continue to configure the instance details button.On the further screens, you do not need to change anything. You could click on Next and add storage and further move to a next button which would allow add tags buttons.

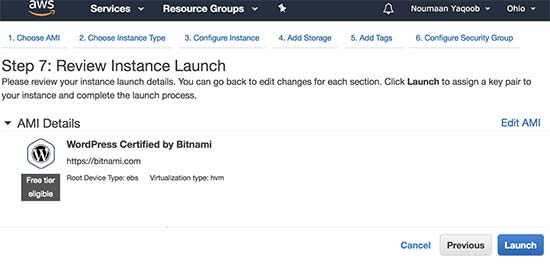
Now you can enter names in the instance tag. You can click on the add tag button and you could enter name as the key and enter my WordPress as one of the values.You can further click on the review and launch button to continue. As soon as you do that you get to see a complete EC2 configuration which is created. Now click on launch button to start the instance that has been created.
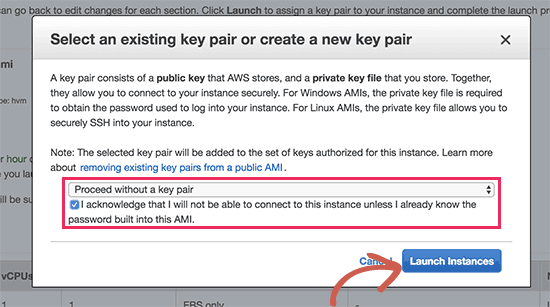
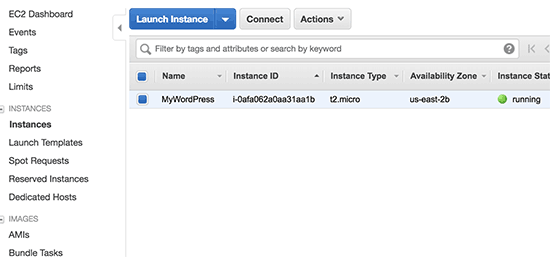
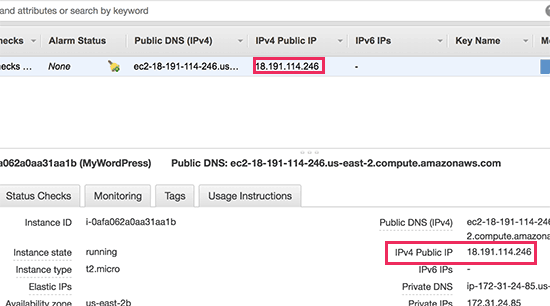
Post this, when you are asked to select a pair of keys, you can select proceed without a key pair, and click on Launch Instance. After you have clicked the instance launch button, the system stores your settings, and launches your EC2 instance. Post successful processing, AWS pops out a successful message. Click on the view instances button which allows you to see your WordPress instance running. To test this created instance, you can locate the public IP address. Copy the same IP address and paste it in the browser tab of the website, where it launches to present you with the actual website which was created.
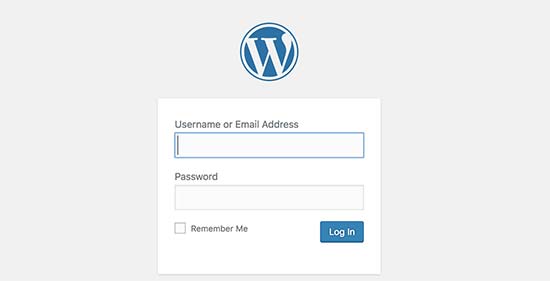
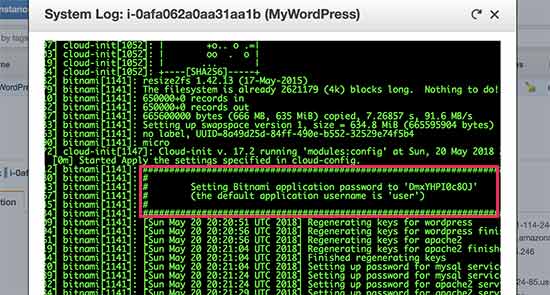
Access the admin area using the username and password. You could go back to the EC2 console and clicking on the Actions button. Further go to the instance settings and get the system logs. This further presents you with the pop up which has a lot of texts. You can scroll down towards the bottom of the screen, where you can find a “Setting Bitnami User Password” which is surrounded by ##. You can see default usernames which have been set by app.
You can copy the information, username and password, and paste it on the login screen. This launches you into WordPress site which is a clear indication that it has been installed safely.Register your domain name and add it to the AWS instance for the website.

How do you add a domain name to your WordPress site on the Amazon Web Service?
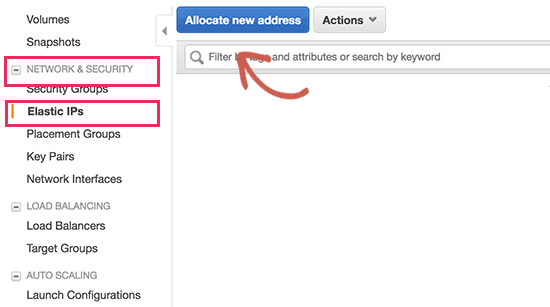
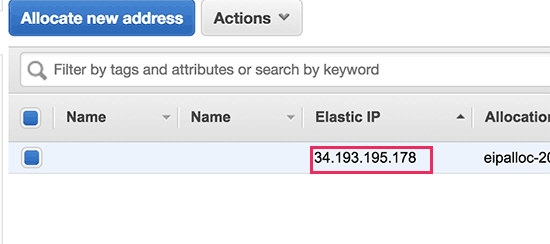
First, you could go to the EC2 instances dashboard and click on the Elastic IPS under the Network and Security section. You could then click on the allocate new address button to continue. You would be asked if you would want to use your IP address and how you would want to use it. Simply click on the allocate button to continue in to the website.
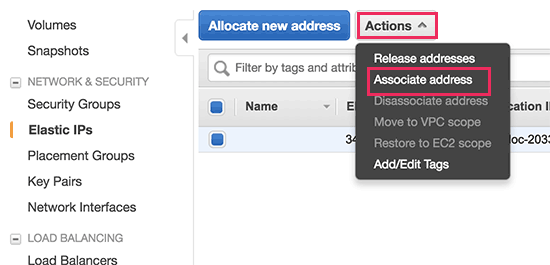
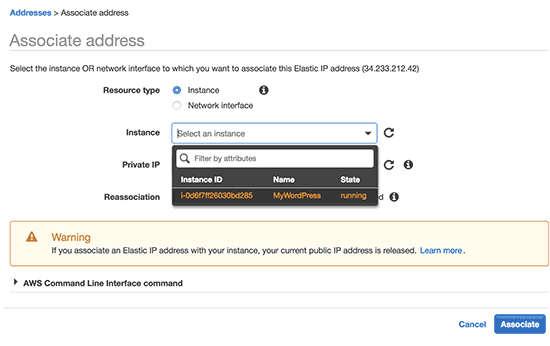
Pick out the associate Address under the Actions button, AWS would have created a new elastic IP. You could move to the next point on the screen, which would ask you to click on the Associate Button. The Elastic IP now gets listed on the table. You could always copy and paste the whole thing on a notepad.
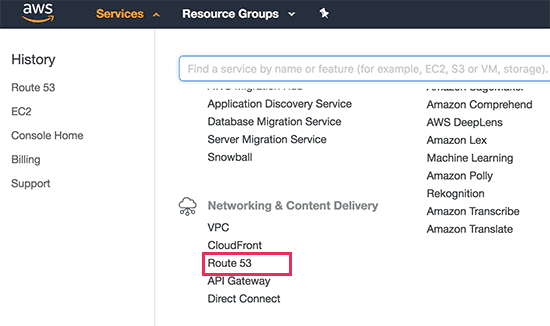
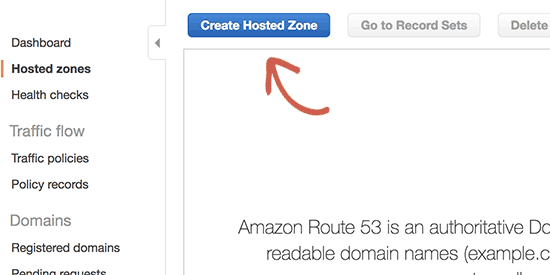
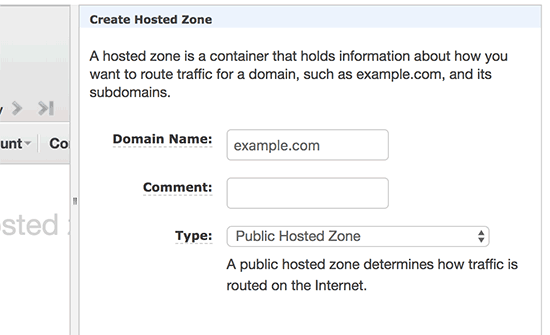
Next, you could click on the services menu and search for the Route 53. This helps you manage the traffic well on the website.You can click on the Get Started Now button which helps you. A hosted zone section allows you to navigate and click on the same. Add the domain name and host it by adding to the zone. You could create, record and set where you can create a new instance by clicking on the create button.
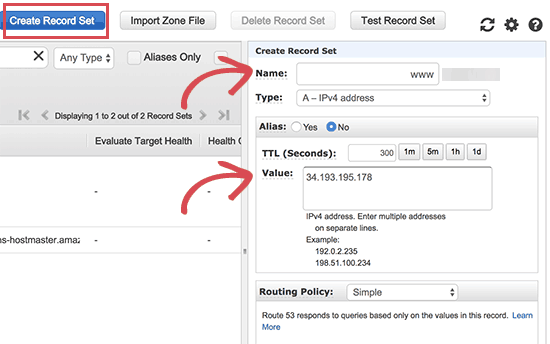
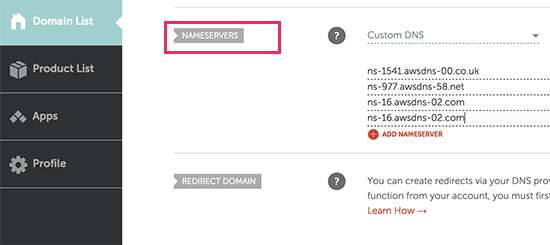
The record now gets added to the hosted zone along with the domain name. You could copy the lines the NS field which is listed in the column. You can get to the domain name registrar website and domain name settings which varies from provider to provider. Under the domain name, there are fields where you could copy and move on.
Save changes and it could take a while to show effects.
Hope you liked the post and learnt something new from it. If you have any suggestion and query, do comment.